

Showing all posts tagged "Property Damage Restoration"
5 Hidden Places Mold Might Be Lurking in Your Home (And How to Find It)
Posted on November 1st, 2024
Prevent Mold Growth After a Flood: Effective Tips for Water Damage
Have you experienced flooding in your home? Don’t let mold threaten your family’s health and your property’s integrity. In this post, we’ll share expert advice from the Doctor Fix-It team on how to prevent mold from growing, clean up properly after a flood, and restore your home to a safe, healthy condition free from mold.
The Dangers of Mold After a Flood
Mold can start growing within 24-48 hours of a flood, posing serious risks to your health and your home:
- Health risks: Mold exposure can cause respiratory issues, allergic reactions, and long-term health effects, especially for those with weakened immune systems or pre-existing conditions.
- Structural damage: Mold can weaken and deteriorate building materials, compromising the integrity of your home’s structure.
- Rapid growth: Mold spores thrive in damp, humid conditions and can spread quickly throughout your home if not addressed promptly.
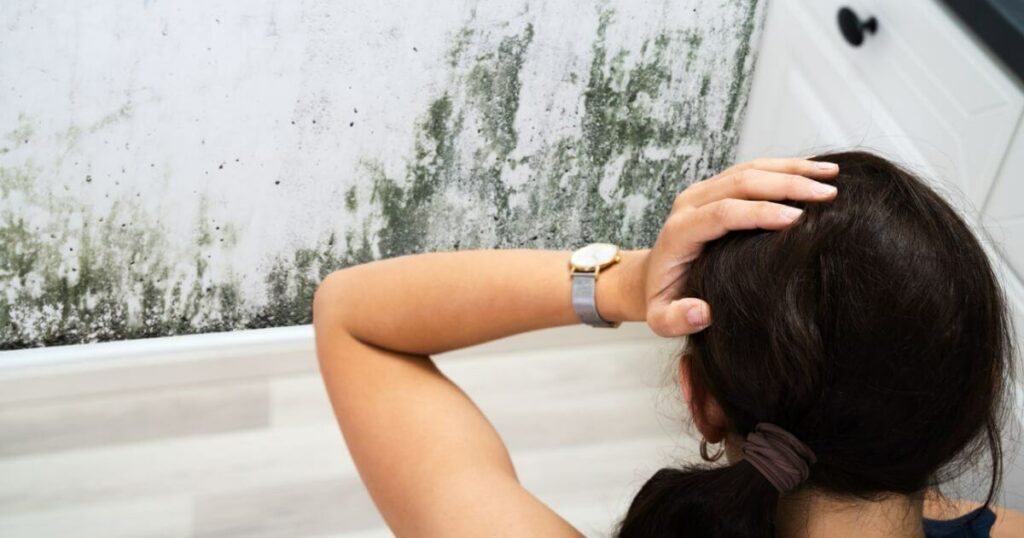
Signs of Mold Growth
Be on the lookout for these warning signs of mold growth after a flood:
- Visible growth and discoloration on walls, ceilings, or furnishings
- Musty, earthy odors that persist even after cleaning
- Unexplained health symptoms in your family, such as allergies or respiratory issues
If you notice any of these signs, it’s crucial to take action immediately to prevent further damage.

Immediate Steps to Take After Flooding
When dealing with water damage after a flood, your priority should be ensuring your family’s safety and preventing mold growth:
- Safety first: Avoid entering your home if there are structural risks or hazards like live electrical wires. Wait for the all-clear from professionals.
- Document damage: Take photos or videos of the flood damage for insurance claims before you start cleaning up.
- Remove water and wet materials: Use pumps, wet/dry vacuums, and mops to remove standing water. Remove wet carpeting, furniture, and other porous materials.
- Start drying: Open windows and doors, and use fans and dehumidifiers to begin the drying process. The faster you can dry out your home, the less chance mold has to grow.
Cleaning and Disinfecting
Proper cleaning and disinfection are essential to help prevent mold to grow and ensure a healthy environment:
- Wear protective gear like gloves, masks, and goggles to avoid exposure to mold and cleaning chemicals.
- Clean all hard surfaces with hot water and detergent, then apply a disinfectant to kill any remaining mold spores.
- Wash fabric items like curtains and bedding in hot water, or take them to a professional cleaner.
- Replace porous materials like drywall, insulation, and carpet padding that can’t be fully dried and disinfected.
- Consider getting water damage restoration done from a professional like Doctor Fix It
Preventing Mold Growth
Even after the initial flood cleanup, you’ll need to stay vigilant to stop mold from taking hold in your home:
- Maximize ventilation: Open windows and run fans to keep air circulating and moisture levels low.
- Monitor humidity: Use a humidity meter to ensure indoor humidity stays below 50%. Running a dehumidifier can help.
- Remove porous materials: Porous items like furniture and carpet can trap moisture making it a perfect environment for mold to grow, so remove anything that can’t be completely dried.
- Professional inspection: Have your home inspected by a certified mold remediation specialist who can identify hidden mold growth and recommend a course of action.

Professional Mold Remediation
In some cases, the safest and most effective solution is to hire a professional mold removal service:
- If you have extensive water damage or a large area affected by mold
- If you suspect mold growth in hard-to-reach areas like inside walls or under flooring
- If you or a family member has a health condition that could be aggravated by mold exposure
Doctor Fix It specializes in professional mold remediation, with advanced equipment and techniques to thoroughly remove mold and restore your home’s safety. Our certified technicians are trained to handle even the toughest mold challenges with care and expertise.
Restoring Your Home After Mold Damage
After the mold has been removed, you may need to repair and restore damaged areas of your home:
- Repair structural damage like warped flooring or weakened framing.
- Replace materials that were removed due to mold growth, such as drywall, carpeting, and cabinets.
- Repaint walls and ceilings with mold-resistant paint to inhibit future growth.
- Have your HVAC system professionally cleaned to remove any mold spores that may have spread through the ductwork.
Throughout the restoration process, continue to monitor your home for signs of returning mold growth, and address any moisture issues promptly.

What You Can Do to Prevent Future Mold Issues
While you can’t always prevent flooding, you can take steps to protect your home from mold growth in the future:
- Regular inspections: Inspect your home periodically for leaks, condensation, or signs of water damage, especially in mold-prone areas like bathrooms, basements, and attics.
- Prompt repairs: If you do find a moisture problem, have it repaired quickly by a professional to avoid giving mold a chance to grow.
- Proper ventilation: Ensure your home has adequate ventilation, especially in high-moisture areas like kitchens and bathrooms. Use exhaust fans and open windows when cooking or showering.
- Mold-resistant products: When renovating or replacing materials, consider using mold-resistant drywall, sheetrock, and other building materials to provide an extra layer of protection.
By staying proactive and addressing moisture issues early, you can significantly reduce the risk of mold growth in your home.
Why Choose Doctor Fix It for Mold Inspection and Remediation
When you’re dealing with water damage and mold after a flood, you need a team you can trust to prioritize your family’s health and safety. At Doctor Fix It, we offer:
- Expertise: Our certified mold remediation specialists have the training and experience to handle any mold situation safely and effectively.
- Advanced techniques: We use state-of-the-art equipment and proven methods to detect, remove, and prevent mold growth in your home.
- Customer focus: We understand the stress and disruption that mold can cause, and we work hard to make the remediation process as seamless as possible for your family.
- Licensed and insured: Our technicians are fully licensed and insured for your protection and peace of mind.
With Doctor Fix It, you can feel confident that your home is in good hands as we work to restore it to a healthy, mold-free condition.
Don’t Let Mold Take Over Your Home
Mold growth after flooding is a serious issue that requires quick, decisive action to protect your home and family. But you don’t have to face this challenge alone. Doctor Fix It is here to provide expert guidance and service at every step, from the initial mold inspection to the final restoration.
Let Doctor Fix It Help You Prevent Mold After Water Damage
Don’t wait until mold takes hold in your home. Contact Doctor Fix-It today to schedule your professional mold inspection and remediation service. Let us help you restore your home and your peace of mind after a flood. Call us now at (856) 630-9882 or visit our website at https://doctorfixit.net to learn more about our services and schedule your appointment. With Doctor Fix It, you can breathe easy knowing your home is in expert hands.
Posted on October 17th, 2024
12 Warning Signs of Water Damage in Your Home: Expert Guide to Detection and Prevention
Water damage can silently devastate homes and businesses, leading to severe structural issues if left unchecked. Recognizing the subtle signs of water damage early is crucial for preventing extensive destruction and costly repairs. At Doctor Fix-It, we specialize in professional water damage restoration services that address these issues promptly and effectively. In this article, we’ll explore key indicators of water damage and highlight the importance of professional intervention.
The Hidden Threat of Water Damage
Water damage is a silent menace that can wreak havoc on your home, often going unnoticed until significant damage has occurred. From compromising structural integrity to fostering mold growth, the consequences of unchecked water damage can be severe and costly. Understanding the signs of water damage is crucial for every homeowner, as early detection can save thousands in repairs and protect your family’s health.
Water damage can stem from various sources, including:
– Leaky pipes or plumbing fixtures
– Roof leaks
– Faulty appliances (washing machines, dishwashers, water heaters)
– Poor drainage around the home’s foundation
– Natural disasters like floods or severe storms
The importance of early detection cannot be overstated. Catching water damage in its initial stages allows for quicker, less expensive repairs and prevents secondary issues like mold growth or structural weakening. By familiarizing yourself with the signs of water damage, you’re taking a proactive step in protecting your home and investment.
Visual Signs of Water Damage
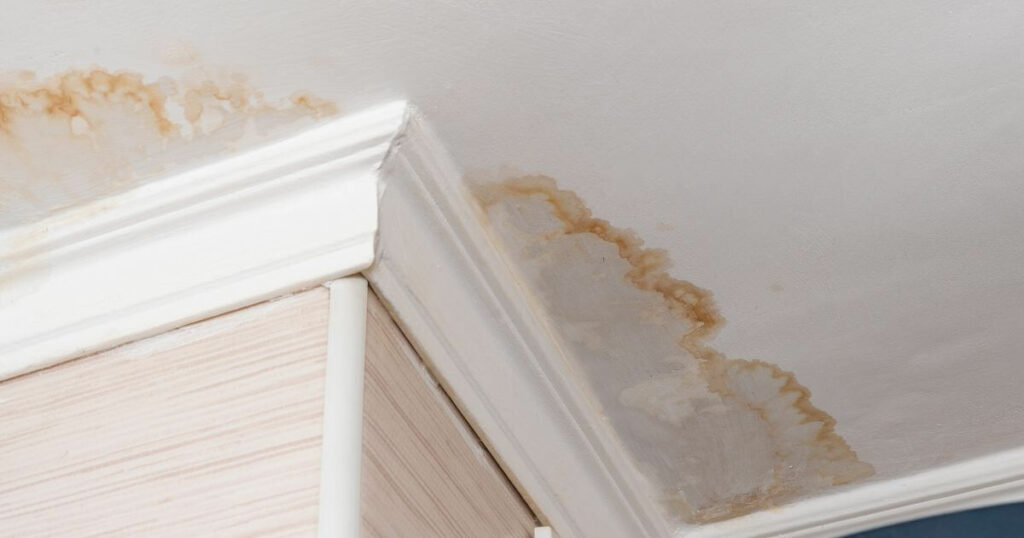
Water Stains and Discoloration
One of the most obvious indicators of water damage is the presence of water stains or discoloration on walls, ceilings, or floors. These stains often appear as brownish or yellowish marks and may grow in size over time. Pay close attention to corners, areas around windows, and beneath sinks where water is more likely to accumulate.
Peeling or Bubbling Paint and Wallpaper
When water seeps behind walls, it can cause paint or wallpaper to separate from the surface. Look for areas where paint is bubbling, cracking, or flaking off. In the case of wallpaper, watch for seams that are curling or sections that are peeling away from the wall.
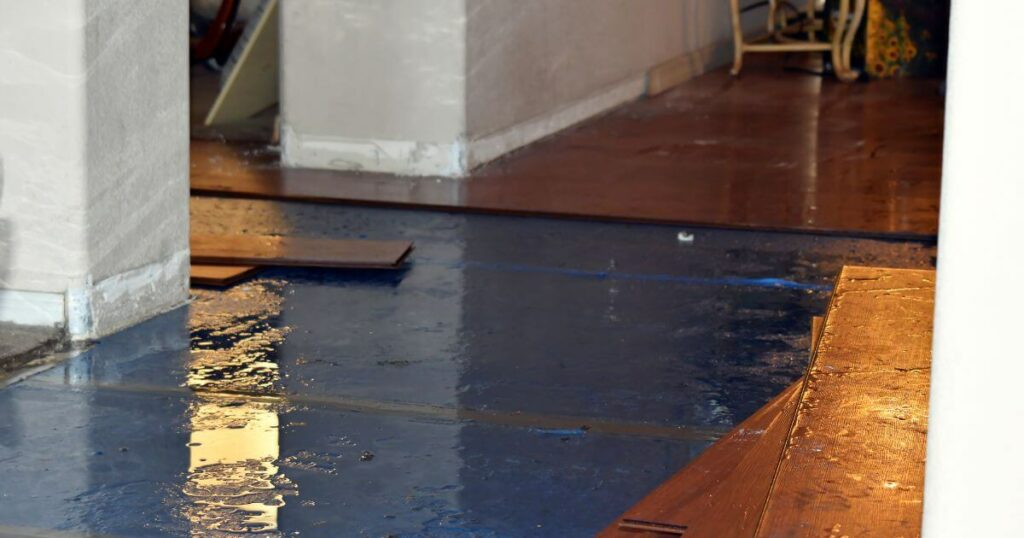
Warping or Buckling of Walls and Floors
Excess moisture can cause materials like wood and drywall to swell and warp. In flooring, this may manifest as cupping (edges higher than the center) or crowning (center higher than the edges) in wood planks. For walls, look for any bowing or curves that weren’t there before.
Visible Mold Growth
While not all mold growth is due to water damage, its presence often indicates excess moisture. Mold can appear as dark spots or patches and may have a fuzzy or slimy texture. Common areas for mold growth include bathrooms, basements, and any areas with poor ventilation.
Non-Visual Indicators of Water Damage
Musty Odors and Increased Humidity
A persistent musty smell is often one of the first signs of water damage, especially in areas that aren’t frequently visited like attics or crawl spaces. This odor is typically caused by mold or mildew growth. Additionally, you may notice an increase in humidity levels in certain areas of your home, which can indicate hidden moisture problems.
Unexplained Increase in Water Bills
If you notice a sudden spike in your water bill without a corresponding increase in usage, it could indicate a hidden leak. Keep track of your monthly bills and investigate any unexplained increases promptly.
Sounds of Running Water When Fixtures Are Off
Listen carefully when all water sources in your home are turned off. If you hear the sound of running water, it could indicate a leak within your walls or underground pipes.
Changes in Texture of Walls, Ceilings, or Floors
Water damage can alter the texture of various surfaces in your home. Walls and ceilings may feel soft, spongy, or damp to the touch. Floors might feel uneven or have a springy feeling when walked on. These changes in texture are often signs of underlying water issues.
Specific Areas to Check for Water Damage
Bathroom and Kitchen Signs
In these high-moisture areas, be vigilant for:
– Loose or detaching tiles
– Grout or caulk that’s cracking or moldy
– Soft spots around toilets, sinks, or tubs
– Cabinet damage or warping under sinks
Basement and Foundation Indicators
Look for these water damage signs:
– Cracks in the foundation walls
– White, powdery residue on concrete walls (efflorescence)
– Pooling water around the foundation
– Damp or musty smells
Attic and Roof Warning Signs
Check for these signs caused by water:
– Stains on the underside of the roof sheathing
– Wet or compressed insulation
– Light coming through the roof boards
– Sagging roof deck
Exterior Signs of Water Damage
Outside your home, identify water damage by looking for:
– Overflowing gutters or downspouts directed towards the foundation
– Water stains on exterior walls
– Cracks or gaps in siding or masonry
– Pooling water in the yard, especially near the house
Hidden Water Damage: The Silent Destroyer
Hidden water damage is particularly insidious because it can cause extensive harm before it’s discovered. It often occurs in areas that are out of sight, such as:
– Inside walls
– Under floorboards
– In crawl spaces
– Behind appliances
The dangers of hidden water damage include:
– Structural damage or weakening of wood framing and drywall
– Electrical hazards from water contact with wiring
– Extensive mold growth in dark, damp areas
– Insect infestations attracted by moisture
To detect concealed water issues:
– Use a moisture meter to check suspicious areas
– Look for subtle signs like slight discoloration or warping
– Pay attention to any musty odors
– Consider thermal imaging cameras for professional-level detection
Professional inspection methods often include:
– Non-invasive moisture meters
– Infrared cameras to detect temperature differences caused by moisture
– Borescopes to visually inspect inside walls or other hard-to-reach areas
Immediate Steps to Take When Water Damage is Detected
When you discover water damage, quick action is crucial:
Stop the Source of Water
When faced with water damage, swift action is crucial to minimize its impact. Begin by shutting off the main water supply if necessary, then immediately repair any visible leaks you can safely address. Finally, focus on removing any standing water as quickly as possible using buckets, mops, or a wet vacuum to prevent further damage to your property.
Document the Damage
Thorough documentation is essential when dealing with water damage in your home. Start by taking comprehensive photos and videos of all affected areas, capturing the extent of the damage from multiple angles. Create a detailed inventory of damaged items, noting their condition and estimated value. Be sure to keep all receipts for emergency repairs or temporary fixes, as these may be necessary for insurance claims or tax purposes.
Contact Insurance and Professionals
When dealing with water damage, time is of the essence. Promptly notify your insurance company about the incident, providing them with details about the cause of water damage and the extent of the destruction. Next, contact a reputable water damage restoration company like Doctor Fix It, who can quickly assess the situation and begin the restoration process. Remember, swift action is crucial as mold can start growing within 24-48 hours of water exposure, potentially complicating the restoration efforts and posing health risks.
Preventing Future Water Damage
Proactive measures can significantly reduce the risk of water damage:
Regular Maintenance Tips
Regular home maintenance is key to preventing water damage. Inspect and clean your gutters regularly, as clogged gutters could be a sign of potential water intrusion issues. Additionally, check and maintain appliance hoses, seal windows and doors properly, and conduct bi-annual roof inspections to catch any problems early.
Upgrading Plumbing and Appliances
Upgrading your home’s plumbing and appliances can significantly reduce the risk of water damage. Consider replacing old pipes, especially in homes over 30 years old, as aging plumbing systems are more prone to leaks and bursts. Installing water leak detection systems and upgrading to more efficient, reliable appliances can provide an additional layer of protection against unexpected water damage.
Improving Drainage and Waterproofing
Improving drainage and waterproofing are essential steps in protecting your home from water damage. Ensure proper grading around your home’s foundation, install a sump pump in basements, and apply waterproof sealants to basement walls, as dampness in these areas could be common signs of potential water issues. If you notice persistent yard drainage problems, consider installing French drains to redirect water away from your home’s foundation and get your home better protected against water infiltration.

When to Call a Professional
While some minor water issues can be handled DIY, certain signs indicate the need for professional help:
– Large areas of visible mold
– Water damage affecting multiple rooms or levels
– Suspicion of contaminated water (sewage backups)
– Persistent musty odors despite cleaning efforts
– Structural concerns like sagging ceilings or floors
Benefits of expert water damage restoration include:
– Thorough water extraction and drying techniques
– Professional-grade equipment for moisture detection and removal
– Knowledge of proper sanitization methods
– Experience in preventing secondary damage like mold growth
FAQs
1. How quickly does water damage occur?
Water damage can begin almost immediately upon contact. Within minutes, water can spread to other areas and be absorbed by porous materials. Within hours, drywall can begin to swell, and metals can start to tarnish. After 24 hours, mold growth can begin, and wood can start warping.
2. Can water damage be fixed without professional help?
Minor water damage may be addressable without professional help, but it’s crucial to ensure thorough drying and address the root cause. For significant damage or if you’re unsure of the extent, it’s best to consult professionals to prevent further issues.
3. How much does water damage restoration typically cost?
Costs can vary widely depending on the extent of damage and the affected areas. Minor issues might cost a few hundred dollars, while significant water damage could run into tens of thousands. Your homeowners insurance may cover some or all of the costs, depending on the cause and your policy.
4. Is water damage covered by homeowners insurance?
Most standard homeowners insurance policies cover sudden and accidental water damage, such as from a burst pipe. However, damage from gradual leaks or flooding typically requires separate coverage. Always check your specific policy and consult with your insurance provider.
5. How long does it take to repair water damage?
The timeline for water damage repair can range from a few days for minor issues to several weeks for extensive damage. The drying process alone typically takes 3-5 days, with additional time needed for repairs and restoration.
Doctor Fix It: Your Trusted Partner in Professional Water Damage Restoration
Water damage is a serious threat to your home, but with vigilance and proper maintenance, you can minimize the risk. By understanding the signs of water damage, conducting regular inspections, and addressing issues promptly, you can protect your home and avoid costly repairs.
Remember, when it comes to water damage, early detection and swift action are key. If you’re ever in doubt about the extent of water damage or how to address it, don’t hesitate to call in professionals like Doctor Fix It. Our team has the expertise and equipment to quickly assess and address water damage issues, ensuring your home remains safe, dry, and comfortable.
Don’t let water damage catch you off guard. Stay informed, stay vigilant, and know that Doctor Fix-It is always here to help when you need us.
Posted on July 12th, 2024
Mastering Basement Flood Cleanup and Water Extraction: Techniques, Tips, and When to Call the Pros
Cleanup Guide to a Flooded Basement
Water damage in your basement can be a homeowner’s worst nightmare. Whether caused by heavy rainfall, a burst pipe, or a malfunctioning appliance, standing water in your basement can lead to extensive damage, mold growth, and structural issues if not addressed promptly and properly. At Doctor Fix-It, we specialize in professional water extraction in Riverside, New Jersey, ensuring that your basement is thoroughly dried and restored.
In this comprehensive guide, we’ll explore the most effective techniques for basement water extraction, including essential equipment, proper drying methods, and when to call in the professionals. By following these steps and tips, you can minimize damage, prevent mold growth, and restore your basement to its pre-damage condition. Trust Doctor Fix-It for reliable and efficient water damage restoration services that protect your home and peace of mind.
Assessing the Damage and Finding the Source
Different types of water damage
Before diving into water extraction techniques, it’s crucial to assess the extent of the damage and identify the type of water you’re dealing with. There are three main categories of water damage:
- Clean water: Originating from a clean source like a broken pipe or overflowing sink, this type of water is not harmful to human health.
- Gray water: Slightly contaminated water from sources such as washing machines or dishwashers, which may contain chemicals or bacteria.
- Black water: Highly contaminated water from sewage backups, flooding, or standing water that has begun to support microbial growth.
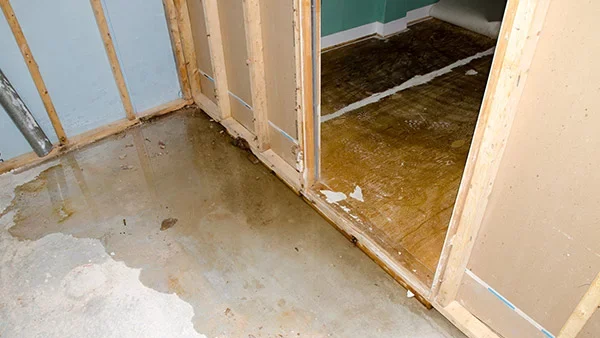
Common sources of basement water intrusion
To effectively address water damage, you must locate the source of the intrusion. Common sources include:
- Foundation cracks: Cracks in your basement walls or floor can allow water to seep in during heavy rainfall or when the ground is saturated.
- Poor drainage: Clogged gutters, downspouts, or a lack of proper grading around your foundation can cause water to pool near your basement walls.
- Plumbing leaks: Burst pipes, leaking appliances, or faulty water heaters can quickly flood your basement.
- Sewer backups: A clogged or overflowing sewer line can force contaminated water into your basement through drains or toilets.
Once you’ve identified the source of the water intrusion, take steps to stop the flow of water if possible, such as turning off the main water supply or unclogging drains.
Essential Equipment for Water Extraction
Features and benefits of wet/dry vacuums
Wet/dry vacuums are versatile tools that can handle both liquid and solid debris. When choosing a wet/dry vacuum for basement water extraction, look for the following features:
- High-capacity tank: A larger tank will allow you to remove more water without frequent emptying.
- Powerful motor: A strong motor will provide better suction and faster water removal.
- Durable hose: A high-quality, reinforced hose will resist kinking and withstand the demands of water extraction.
Submersible pump types and applications
For deeper water or larger areas, a submersible pump is an efficient choice. There are two main types of submersible pumps:
- Primary pumps: Designed for continuous use, these pumps are ideal for removing large volumes of water quickly.
- Utility pumps: More portable and lightweight, utility pumps are perfect for smaller jobs or tight spaces.
When selecting a submersible pump, consider the pump’s flow rate, head pressure, and power source to ensure it meets your needs.
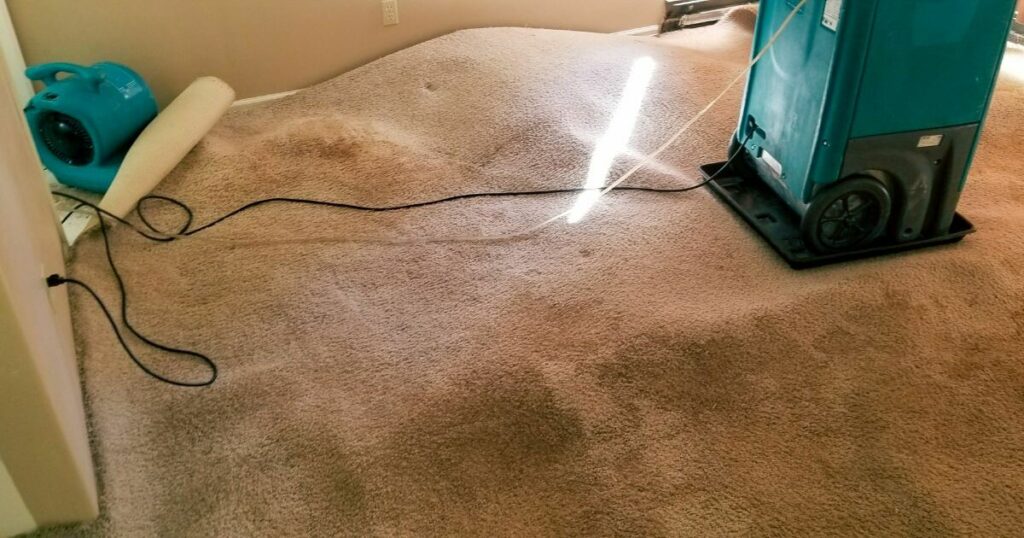
Choosing the right dehumidifier and fan
After water extraction, drying out your basement is essential to prevent mold growth and further damage. Dehumidifiers and fans are crucial tools in this process. When choosing a dehumidifier, consider the following factors:
- Capacity: Select a dehumidifier with a capacity appropriate for your basement’s size and moisture level.
- Energy efficiency: Look for Energy Star-rated models to save on operating costs.
- Automatic shut-off: A dehumidifier with an automatic shut-off feature will prevent overflow when the tank is full.
High-volume fans, such as air movers or blowers, can help circulate air and speed up the drying process. Choose fans with multiple speed settings and durable construction for the best results.
Step-by-Step Water Extraction Process
Safety gear and precautions
Before beginning the water extraction process, ensure you have the proper safety gear:
- Rubber gloves: Protect your hands from contaminants and chemicals.
- Boots: Wear rubber boots with good traction to avoid slips and falls.
- Face mask: If mold or sewage is present, wear a face mask to prevent inhaling harmful particles.
- Safety glasses: Protect your eyes from splashes and debris.
Additionally, turn off the electricity in the affected area to avoid the risk of electrocution.
Setting up and using extraction equipment
- Position your wet/dry vacuum or submersible pump in the lowest part of the flooded area.
- If using a wet/dry vacuum, attach the appropriate nozzle or hose for water extraction.
- For submersible pumps, connect a discharge hose long enough to reach a suitable drainage point, such as a storm drain or outdoor area away from your foundation.
- Turn on the equipment and begin extracting water, moving the vacuum nozzle or pump as needed to remove water from all areas.
Monitoring the extraction process
As you extract water, keep an eye on the progress and watch for any signs of structural damage, such as:
- Cracks in walls or floors: Water pressure can cause existing cracks to widen or new ones to form.
- Bulging or sagging walls: Saturated drywall or insulation can cause walls to bulge or sag.
- Warped or buckling floors: Moisture can cause wood floors to warp or buckle, while tile or linoleum may loosen.
If you notice any of these signs, stop the extraction process and consult a professional to assess the damage and determine the best course of action.
Drying Techniques and Preventing Mold Growth
Drying techniques for different materials
After removing standing water, it’s essential to thoroughly dry out your basement to prevent mold growth and further damage. The drying process may vary depending on the materials involved:
- Drywall: If drywall has been saturated for less than 48 hours, it may be salvageable. Use fans and dehumidifiers to dry the walls, and consider drilling small holes near the base to allow for better air circulation.
- Carpeting: Remove wet carpeting and padding as soon as possible. If the carpet has been wet for less than 24 hours, it may be possible to clean and dry it. However, if sewage or contaminated water is involved, it’s best to discard the carpeting.
- Wood floors: Use fans and dehumidifiers to dry wood floors slowly and evenly to prevent warping. If floors are severely damaged, they may need to be replaced.
- Concrete: Although concrete is less susceptible to water damage, it can still retain moisture. Use fans and dehumidifiers to dry the surface, and consider using a floor squeegee to remove excess water.
Optimal dehumidifier and fan placement
To achieve the best drying results, place dehumidifiers and fans strategically:
- Position dehumidifiers in the center of the room or in areas with the highest moisture levels.
- Place fans at doorways and windows to help circulate air and promote evaporation.
- Direct fans toward wet walls or floors to speed up the drying process.
Monitor the drying progress using a moisture meter to ensure all materials return to their normal moisture levels.
Cleaning and disinfecting to prevent mold
Once your basement is dry, it’s crucial to clean and disinfect all surfaces to prevent mold growth. Follow these steps:
- Remove any remaining debris or damaged materials.
- Clean all surfaces with a mixture of warm water and detergent.
- Disinfect surfaces using a solution of 1 cup of bleach per gallon of water, or use a commercial disinfectant specifically designed for mold and mildew.
- Allow surfaces to dry completely.
When to Call Professional Water Extraction Services
Indicators of structural damage
While some water extraction tasks can be handled by homeowners, certain situations call for professional water damage restoration. If you notice any of the following signs of structural damage, contact a professional water extraction service immediately:
- Significant cracks in walls or foundations
- Sagging or collapsing ceilings
- Extensive warping or buckling of floors
- Visible mold growth
Advantages of professional water extraction
Professional water extraction services offer several benefits:
- Expertise: Professional technicians have the knowledge and experience to assess the damage accurately and develop an effective extraction and drying plan.
- Advanced equipment: Professionals have access to high-powered extraction equipment, industrial-strength dehumidifiers, and specialized drying tools to handle even the most severe water damage.
- Timesaving: With their expertise and equipment, professionals can complete the extraction and drying process more quickly than homeowners, minimizing the risk of further damage.
- Insurance assistance: Many water extraction companies can work directly with your insurance provider to streamline the claims process.
Emergency situations requiring immediate professional help
Some water damage situations require immediate professional attention:
- Sewage backup: Due to the health hazards associated with sewage, it’s essential to call a professional with the proper protective gear and cleaning equipment.
- Extensive flooding: If your basement has more than a few inches of standing water, professional extraction is necessary to remove the water quickly and safely.
- Electrical hazards: If water has come into contact with electrical outlets, wiring, or appliances, contact a professional to avoid the risk of electrocution.
Preventing Future Basement Water Issues
Gutter and downspout maintenance
Regular maintenance of your gutters and downspouts can help prevent basement water intrusion:
- Clean gutters and downspouts at least twice a year to remove debris and ensure proper water flow.
- Ensure downspouts extend at least 4 feet away from your foundation to divert water away from your basement.
- Consider installing gutter guards to minimize debris buildup and maintain clear gutters.
Sealing foundation cracks and gaps
Inspect your basement walls and floor regularly for cracks or gaps, and seal them promptly to prevent water intrusion:
- Use hydraulic cement or masonry caulk to fill small cracks and gaps.
- For larger cracks or structural issues, consult a professional to assess the damage and recommend the appropriate repair method.
- Apply a waterproof sealant to your basement walls and floor to provide an additional barrier against water intrusion.
Sump pump installation and maintenance
Installing a sump pump can help remove excess water from your basement and prevent flooding:
- Choose a sump pump with a capacity suitable for your basement’s size and water table level.
- Install the sump pump in the lowest part of your basement, typically in a sump pit.
- Regularly test your sump pump to ensure it’s working properly and perform any necessary maintenance or repairs.
- Consider installing a battery backup to keep your sump pump operating during power outages.
Understanding proper water removal techniques
Basement water extraction can be a daunting task, but by understanding the proper techniques, using the right equipment, and knowing when to call in the professionals, you can minimize damage and restore your basement to its pre-damage condition. Remember to prioritize safety, work efficiently, and take steps to prevent future water intrusion. If you’re ever unsure about the extent of the damage or the best course of action, don’t hesitate to contact a professional water extraction service for guidance and assistance.
Frequently Asked Questions
- How long does it take for mold to grow after water damage? Mold can begin to grow within 24-48 hours of water exposure, making prompt water extraction and drying crucial.
- Can I use bleach to kill mold in my basement? While bleach can kill surface mold, it may not penetrate porous materials like drywall or wood. It’s best to use a specialized mold remover or consult a professional for severe mold growth.
- Will my homeowner’s insurance cover basement water damage? Coverage for basement water damage varies by policy and the cause of the damage. Review your insurance policy and contact your provider for specific guidance.
- How long does it take to dry out a flooded basement? Drying time depends on the extent of the damage, the materials involved, and the drying methods used. It can take anywhere from a few days to several weeks.
- Can I stay in my home during the water extraction and drying process? If the water damage is limited to your basement and there are no electrical or structural hazards, you may be able to stay in your home. However, if the damage is extensive or there are health concerns, it may be necessary to temporarily relocate.
Basement Flooded? Call Doctor Fix It for Fast, Reliable Water Restoration
If you’re facing a basement water emergency or need professional guidance, contact Doctor Fix It for expert water extraction and restoration services. Our experienced team is ready to help you minimize damage and restore your basement quickly and efficiently. Don’t let water damage jeopardize your home’s safety and structural integrity—call Doctor Fix It today to learn more about our services and schedule a consultation.
Posted on June 21st, 2024
Understanding the Health Risks of Mold and the Importance of Professional Mold Remediation
Mold is a common issue that can affect indoor environments, often growing unnoticed until it becomes a significant problem. As a homeowner, it’s crucial to understand the potential health risks associated with mold exposure and the importance of prompt, professional remediation. At Doctor Fix-It, we specialize in mold inspection and remediation, ensuring your home is safe and healthy. In this article, we’ll explore the causes of mold growth, the signs to watch out for, and the comprehensive process of effective mold removal to ensure a safe and healthy living space. Trust Doctor Fix-It for thorough mold inspection and professional mold remediation to maintain a safe and healthy living space.
Causes of Mold Growth
Mold is a type of fungus that thrives in damp, humid conditions. It can grow on various surfaces and materials, feeding on organic matter such as wood, paper, and fabric. Several factors contribute to mold growth in indoor environments:
- Water leaks and intrusions: Leaky pipes, roofs, or windows can introduce moisture into your home, creating ideal conditions for mold growth.
- Flooding: Whether caused by natural disasters or plumbing issues, flooding can lead to extensive mold growth if not addressed promptly.
- High humidity levels: Excess humidity in your home, often due to poor ventilation or inadequate air circulation, can foster mold growth.
- Poor ventilation: Lack of proper ventilation in bathrooms, kitchens, and other moisture-prone areas can trap humidity and encourage mold growth.
- Condensation on cold surfaces: Cold surfaces like windows, walls, or pipes can attract condensation, leading to moisture accumulation and potential mold growth.
- Wet or water-damaged materials: Damp carpets, drywall, or insulation can become breeding grounds for mold if not dried or replaced promptly.
Identifying and addressing the root causes of mold growth is essential for preventing its recurrence and maintaining a healthy indoor environment.
Health Risks Associated with Mold Exposure
Exposure to mold can lead to various health problems, ranging from mild allergic reactions to more severe respiratory issues. Some of the common health risks associated with mold include:
Respiratory Issues
Mold spores are allergens and irritants that can trigger respiratory problems when inhaled. Exposure to mold can cause symptoms such as:
- Coughing
- Wheezing
- Throat irritation
- Nasal congestion
In individuals with pre-existing respiratory conditions like asthma, mold exposure can exacerbate symptoms and lead to more frequent or severe attacks.
Allergic Reactions
Mold is a common indoor allergen that can cause allergic reactions in sensitive individuals. These reactions can range from mild to severe, with symptoms including:
- Sneezing
- Runny or stuffy nose
- Itchy eyes, nose, or throat
- Skin rashes or hives
Prolonged exposure to mold can also lead to the development of new allergies, making it crucial to address mold issues promptly.
Immunological Responses
Mold exposure can impact the body’s immune system, making individuals more susceptible to infections. This is particularly concerning for people with compromised immune systems, such as those undergoing chemotherapy or living with chronic illnesses.
Aggravation of Pre-existing Conditions
For individuals with pre-existing health conditions, mold exposure can worsen symptoms and lead to a decline in overall health and quality of life. Some conditions that may be aggravated by mold include:
- Chronic respiratory illnesses (e.g., COPD, asthma)
- Allergies
- Skin conditions (e.g., eczema, psoriasis)
Toxic Mold and Mycotoxins
Certain mold species, such as Stachybotrys chartarum (often referred to as “black mold”), can produce toxic byproducts called mycotoxins. While not all molds are toxic, exposure to mycotoxins can lead to more severe health effects, particularly with prolonged exposure.
It’s essential to have suspected toxic mold professionally identified and removed to minimize health risks.
Recognizing Mold in Your Home
Identifying the presence of mold in your home is the first step in addressing the issue. Here are some signs to watch out for:
Visible Signs
- Visible mold growth in various colors (black, green, brown, or white) and textures (fuzzy, slimy, or powdery)
- Water stains, discoloration, or peeling paint on walls and ceilings
- Bulging or warping of materials due to moisture accumulation
Odors and Musty Smells
- A distinct, musty odor, even in the absence of visible mold growth
- Persistent dampness or earthy smells
Health Symptoms
- Unexplained allergic or respiratory symptoms that improve when away from home
- Recurring health issues among occupants, especially those with pre-existing conditions
High Humidity and Moisture
- Consistently high indoor humidity levels (above 60%)
- Condensation on windows, walls, or cold surfaces
- Presence of water leaks, flooding, or past water damage incidents
If you suspect mold growth in your home, it’s crucial to have a professional inspection and assessment to determine the extent of the problem and develop an effective remediation plan.
The Mold Remediation Process
Mold remediation is a comprehensive process that involves identifying, containing, and removing mold growth while addressing the underlying moisture issues. Here’s an overview of the steps involved:
Inspection and Assessment
- Thorough inspection of the affected areas by certified professionals
- Identification of the extent of mold growth and moisture sources
- Development of a tailored remediation plan
Containment
- Implementation of containment measures to prevent mold spore dispersal
- Use of physical barriers, negative air pressure, and air scrubbers
- Isolation of contaminated areas during the removal process
Air Filtration
- Utilization of HEPA filters in air scrubbers to capture airborne mold spores
- Importance of proper filtration to ensure a safe environment
Removal of Mold-Infested Materials
- Safe removal and disposal of materials heavily contaminated with mold
- Adherence to industry best practices for handling and disposal
Cleaning and Disinfection
- Thorough cleaning and disinfection of non-porous surfaces and salvageable materials
- Use of appropriate antimicrobial agents to eliminate remaining mold spores
Drying and Dehumidification
- Complete drying of the affected areas to eliminate moisture
- Use of specialized equipment like dehumidifiers and air movers
- Importance of achieving proper moisture levels to prevent future mold growth
Post-Remediation Verification
- Final inspection to ensure successful mold removal and restoration
- Air quality testing to confirm acceptable mold spore levels
- Documentation of the remediation process for future reference
Preventive Measures
- Guidance on preventing future mold growth
- Addressing moisture sources, improving ventilation, and regular inspections
- Importance of maintaining a dry and well-ventilated environment

Mold Removal vs. Mold Remediation
It’s important to understand the difference between mold removal and mold remediation when addressing mold issues in your home.
Mold removal often refers to a superficial process that focuses on removing visible mold growth without addressing the underlying causes or preventing future growth. This approach may provide temporary relief but does not offer a long-term solution.
On the other hand, mold remediation is a comprehensive approach that involves identifying and addressing the root causes of mold growth, containing and removing mold-infested materials, and implementing preventive measures to minimize the risk of recurrence. Professional mold remediation companies follow industry standards and best practices to ensure a thorough and effective process.
While DIY mold removal may seem like a cost-effective option, it can often lead to incomplete removal, improper handling of mold-infested materials, and potential health risks. Choosing professional remediation over DIY removal ensures that the job is done correctly, safely, and with a focus on long-term prevention.
Choosing a Professional Mold Remediation Company
When faced with a mold problem, selecting a reputable and experienced mold remediation company is crucial. Here are some factors to consider when choosing a remediation provider:
- Certifications and licenses: Look for companies with certified technicians (e.g., IICRC, ACAC) and appropriate licenses required by your state or local regulations.
- Experience and track record: Choose a company with a proven history of successful mold remediation projects and positive customer feedback.
- Insurance coverage: Ensure that the company carries adequate liability and workers’ compensation insurance to protect you in case of any accidents or damages during the remediation process.
- Detailed remediation plan and transparency: A reputable company will provide a detailed assessment, remediation plan, and transparent communication throughout the process.
- Customer reviews and references: Read customer reviews and ask for references to gauge the company’s reputation and quality of service.
Be cautious of companies that make unrealistic promises, pressure you into making quick decisions, or offer prices significantly lower than other providers. These can be red flags indicating a lack of expertise or questionable business practices.
Trust Doctor Fix It To Create a Mold-Free Home for Your Family’s wellbeing
Mold exposure can pose serious health risks, from allergic reactions to respiratory issues. Doctor Fix It understands the importance of prompt, professional mold remediation in maintaining a safe and healthy living environment. Their certified technicians thoroughly inspect affected areas, identify moisture sources, and develop tailored remediation plans. Using industry-standard practices, Doctor Fix It contains mold growth, removes contaminated materials, and implements preventive measures to minimize recurrence. They prioritize customer safety and satisfaction, offering transparent communication throughout the process. If you suspect mold in your home, don’t hesitate to contact Doctor Fix It for a comprehensive assessment and remediation plan. Trust their expertise to create a mold-free environment for you and your family.
FAQs
- What are the most common symptoms of mold exposure? Common symptoms of mold exposure include allergic reactions (sneezing, runny nose, itchy eyes), respiratory issues (coughing, wheezing, throat irritation), and skin irritation (rashes, hives).
- Can mold cause long-term health problems? Yes, prolonged exposure to mold can lead to chronic respiratory problems, allergies, and a weakened immune system. In some cases, exposure to toxic molds can cause more severe health effects.
- How can I tell if I have a mold problem in my home? Signs of a mold problem include visible mold growth, musty odors, moisture issues (water stains, condensation), and health symptoms that improve when away from home.
- Is it possible to remove mold myself, or do I need professional help? While small, isolated instances of mold growth may be handled with proper precautions, larger or more extensive mold problems should be addressed by professionals to ensure safe and effective removal.
- How long does the mold remediation process typically take? The duration of mold remediation depends on the extent of the mold growth and the size of the affected area. On average, the process can take anywhere from a few days to a week or more.
- Will mold come back after remediation? If the underlying moisture issues are properly addressed and preventive measures are implemented, the likelihood of mold returning is significantly reduced. However, it’s essential to maintain a dry and well-ventilated environment to prevent future growth.
- Is mold remediation covered by homeowners insurance? Coverage for mold remediation varies among insurance policies. Many policies offer limited coverage for mold damage caused by sudden and accidental water events (e.g., burst pipes). However, mold growth resulting from neglect or lack of maintenance may not be covered.
- Can I stay in my home during the mold remediation process? In many cases, you can remain in your home during mold remediation, as the affected areas will be contained and isolated. However, if the mold growth is extensive or if you have severe health sensitivities, your remediation professional may recommend temporary relocation for your safety and comfort.
Posted on May 24th, 2024
How Denver’s Electric Fireplaces Warm Up Your Home Style
As the chilly Denver winters approach, you might be considering affordable yet stylish heating solutions for your home. Look no further—Denver’s finest electric fireplaces offer a cozy, energy-efficient addition to your living space that not only keeps you warm and comfortable but also elevates the style quotient of your home. Doctor Fix-It Plumbing, Heating, Cooling & Electric, a trusted name in expert plumbing, HVAC, and electrical solutions, is proud to introduce these electric fireplaces. Combining the latest technology with eye-catching designs, these fireplaces provide the warmth of a traditional fireplace without the hassle of wood or gas.
In this article, we explore the various benefits of electric fireplaces and why they have become a popular choice for homeowners today. So, stay tuned as we delve into the features of Denver’s electric fireplaces and how they can transform your home into a cozy, chic, and energy-saving haven.
Energy Efficiency and Cost Savings
One of the primary reasons homeowners opt for electric fireplaces in Denver, CO, is the energy efficiency and cost savings they provide. Unlike traditional fireplaces that lose substantial heat through the chimney, electric fireplaces convert 100% of the energy consumed into heat. This greatly reduces heat loss and results in a lower energy consumption.
Moreover, the installation and maintenance costs of electric fireplaces are significantly lower than their wood or gas-fueled counterparts. Considering the benefits from both a monetary and environmental perspective, opting for an electric fireplace becomes an easy choice.
A Versatile Choice for Décor and Installation
One of the most remarkable aspects of electric fireplaces is their versatility in style and design. No matter your home’s aesthetic—be it contemporary, traditional, or something in between—an electric fireplace can seamlessly complement your décor. The variety of designs ranges from wall-mounted units that give your room a sleek and modern vibe to freestanding ones offering a more classic appeal.
This versatility extends to the installation options as well. Unlike traditional fireplaces that require costly and invasive construction, electric fireplaces can be easily installed in various locations within your home. Wall-mounted options work well in small spaces, while built-in models create a stunning focal point for larger rooms. The flexibility in installation ensures that you can select a fireplace that meets your unique needs and preferences.
Safety Considerations
Safety is a top priority for many homeowners, and electric fireplaces offer a safer alternative to traditional fireplaces. There are no open flames, gas leaks, or wood-burning hazards associated with electric fireplaces. The heating elements are concealed, ensuring that the fireplace remains cool to the touch and safe for family members, pets, and furniture. The risk of respiratory issues associated with smoke and other pollutants is also greatly reduced, making electric fireplaces a cleaner and healthier option for your family.
Fireplace Features: Modern Technology and User-Friendly Controls
Besides the visual appeal and heating capabilities, electric fireplaces also come equipped with a host of features that make them convenient and user-friendly. You’ll find fireplaces with adjustable thermostat controls, allowing you to customize the heat output according to your requirements. Energy-saving features, such as timer functions and multi-level heat settings, ensure that you conserve power and keep your consumption bills in check.
Moreover, innovations in technology have contributed to the realistic appearance of electric fireplaces. LED technology is commonly used to create realistic flame effects that can be adjusted to suit your mood. Some models even provide the option of operating the flame display without heat, so you can enjoy the ambiance of a fireplace even during warmer months.
A Green Choice For Your Home
An often-overlooked fact is that electric fireplaces are more environmentally friendly than traditional wood or gas fireplaces. They produce no smoke, fumes, or other pollutants, which helps improve the air quality within your home. Furthermore, as the electricity produced in the United States is becoming increasingly greener with the use of wind and solar power, choosing an electric fireplace contributes positively to a cleaner environment and mitigates the hazards associated with burning fossil fuels.
Making the Right Choice with Doctor Fix-It Plumbing, Heating, Cooling & Electric
While electric fireplaces offer numerous benefits, selecting the right one for your home may feel overwhelming. That’s where the professionals at Doctor Fix-It Plumbing, Heating, Cooling & Electric can assist you. With years of experience in plumbing, HVAC, and electrical solutions, we can guide you in making the perfect choice to complement your home’s style and meet your heating needs.
So, as you plan to upgrade your Denver home with an electric fireplace, make sure to consult with our team of experts for a seamless purchase and installation experience. With our guidance, you’ll be well on your way to creating a cozy, stylish, and energy-efficient living space to enjoy for many years to come.
Experience the Warmth and Style with Doctor Fix-It Plumbing, Heating, Cooling & Electric
It’s clear that Denver’s electric fireplaces offer an unmatched combination of functionality, style, energy efficiency, and safety. As you seek to create a comfortable and modern living space to withstand the chilly Denver winters, an electric fireplace is undoubtedly the perfect addition for both warmth and aesthetic appeal.
Don’t wait any longer to bring this stylish and energy-saving feature into your home. Get in touch with our friendly professionals, who can guide you every step of the way, from selecting the ideal electric fireplace for your home to providing expert installation services. Reach out to us today and schedule a consultation. Experience the warmth and style that only Denver’s electric fireplaces can provide with the help of Doctor Fix-It Plumbing, Heating, Cooling & Electric’s expert HVAC services.
Posted on May 8th, 2024
Doctor Fix-It - Profile Links
Posted on May 1st, 2024
Water Damage Prevention for South Jersey Homes
As a homeowner in South Jersey, safeguarding your property against water damage should be a top priority. Domestic water damage resulting from floods, storms, basement floods, or burst pipes can lead to costly repairs and severely impact the structural integrity of your home. Preventive measures, including regular home maintenance and targeted improvements, can often save you from unnecessary stress, significant repair costs, and preserve the value of your property. In this informative blog series, we’ll explore effective strategies for protecting your South Jersey home from various sources of water damage, giving you the peace of mind that your residence is secure.
The focus of this series is to stress the importance of prevention in mitigating water damage risks, taking measures to reinforce your home’s defenses, and making essential home improvements as needed. As we delve into each topic, we’ll provide practical tips and recommendations that South Jersey homeowners, like you, can implement to fortify your living spaces. We’ll cover essential home maintenance tasks to help prevent water damage, explore ways to reinforce your home’s protection against storms, safeguard your basement from flooding, and provide advice on preventing burst pipes in your residence.
In addition to protecting your home from water damage, taking the proactive steps outlined in this blog series may also help to lower your home insurance premiums, improve overall safety, and enhance the value of your property. By investing time and resources into these preventive measures, you can have confidence in your home’s ability to withstand potential water damage hazards. Follow this blog series to gain essential insights and advice on effectively maintaining and protecting your South Jersey home from the perils of water damage.
Essential Home Maintenance Tasks to Prevent Water Damage
1. Clean and Maintain Your Gutters
Regularly cleaning and maintaining your gutters is crucial in preventing water damage to your home. Clear out any debris, such as leaves and twigs, and ensure that water flows freely through your gutters and downspouts, directing water away from your home’s foundation.
2. Inspect Your Roof for Damage
Conduct routine inspections of your roof to identify any signs of damage, such as cracked or missing shingles, which could allow water to seep into your home. Promptly address these issues to prevent leaks, dampness, and water damage.
3. Seal Doors and Windows
Inspect the seals around your doors and windows to ensure they are tight and in good condition. Replace any damaged or deteriorated weather stripping and apply caulk as needed to prevent water infiltration.
4. Maintain Your Home’s Plumbing System
Conduct periodic inspections of your home’s plumbing system, checking for any loose connections, leaks, or signs of corrosion. Addressing these issues promptly can prevent more significant problems such as burst pipes and severe water damage.
How to Reinforce Your Home’s Protection Against Storms
1. Install a Sump Pump
A sump pump is an essential tool for protecting your home from potential storm-related water damage, especially in homes with basements. This device helps to pump out excess water, reducing the risk of flooding.
2. Install Storm Shutters and Doors
Storm shutters and doors provide an additional layer of protection against strong winds, torrential rain, and flying debris. By strengthening your home’s defenses, you can minimize the impact of storms and mitigate water damage risks.
3. Create a Proper Landscape Drainage System
To ensure effective water drainage away from your home, create a landscape grading plan that moves water away from your house. Strategically planting vegetation and installing drainage structures such as swales can help direct water flow and minimize the risk of flooding.
4. Regularly Inspect and Secure Siding and Masonry
Inspect your home’s siding and masonry for any signs of cracks, damage, or deterioration. Properly repair and seal any identified issues to prevent water intrusion during storms.
Safeguarding Your South Jersey Basement from Flooding
1. Install and Maintain a Proper Basement Waterproofing System
Investing in a quality basement waterproofing system is essential to protect against flooding and related water damage. Systems may include sump pumps, internal and external drainage systems, and sealing to prevent water infiltration.
2. Insulate and Seal Your Basement
Properly insulate your basement to create a barrier against cold air and moisture. This step helps prevent condensation, mold growth, and excessive humidity, which contribute to water damage.
3. Store Valuables and Electronics Off the Floor
In the event of unexpected basement flooding, ensure that your belongings are stored above ground level to minimize potential damage. Shelves or elevated storage solutions can offer great protection for your valuable items.
4. Install a Battery-operated Backup Sump Pump
In case of power outages during storms, a battery-operated backup sump pump will help prevent basement flooding and keep your home protected from water damage.
Preventing Burst Pipes in Your South Jersey Home
1. Insulate Your Pipes
Properly insulating pipes is critical for preventing freezing, especially during the cold winter months. Insulation materials such as foam sleeves or specialized pipe wrapping can help regulate pipe temperatures and reduce the risk of freezing and bursting.
2. Keep Your Home at a Consistent Temperature
Maintaining a consistent temperature inside your home, even when you’re away, helps prevent pipes from freezing, minimizing the risk of a burst pipe.
3. Open Cabinet Doors
During cold weather, open cabinet doors near sinks and pipes to allow warm air to circulate, reducing the chance of freezing pipes.
4. Learn the Location of Your Main Water Shutoff Valve
In the event of a burst pipe, quickly shutting off your home’s main water supply can significantly minimize water damage.
Conclusion
Proactively protecting your South Jersey home from potential water damage hazards is crucial in saving you time, money, and stress. By implementing the preventive measures outlined in this blog series, you’re effectively safeguarding your property and preserving its value. Embracing a proactive approach to home maintenance and improvements goes a long way in providing peace of mind and ensuring your home’s structural integrity remains uncompromised.
Remember, these preventive strategies are crucial; however, in the event of unexpected water damage, don’t hesitate to call upon the expertise of professionals. Doctor Fix-It is here to support South Jersey homeowners with prompt, efficient, and reliable water damage repair in Moorestown, NJ.
Posted on May 1st, 2024
Restoring Peace: A Guide to Property Damage Restoration

Understanding Property Damage Restoration:
The Steps Involved:
FAQs:
- What types of disasters does property damage restoration cover?- How long does the restoration process typically take?- Will my insurance cover the cost of property damage restoration?- Can I stay in my home during the restoration process?- How can I prevent future property damage?
Common Challenges:
- Time Constraints: Property damage restoration often needs to be completed swiftly to prevent further damage and minimize disruption to homeowners' lives.Coordination: Coordinating multiple contractors and vendors involved in the restoration process can be challenging, requiring effective communication and project management skills.
- Cost Management: Balancing the need for quality restoration work with budget constraints can be tricky, but experienced professionals can help homeowners navigate these financial considerations.
Conclusion:
Posted on April 30th, 2024